Watch a demo
Creating an agent
Creating a Frostline agent takes three steps:Configure general settings and conversation flow
General settings
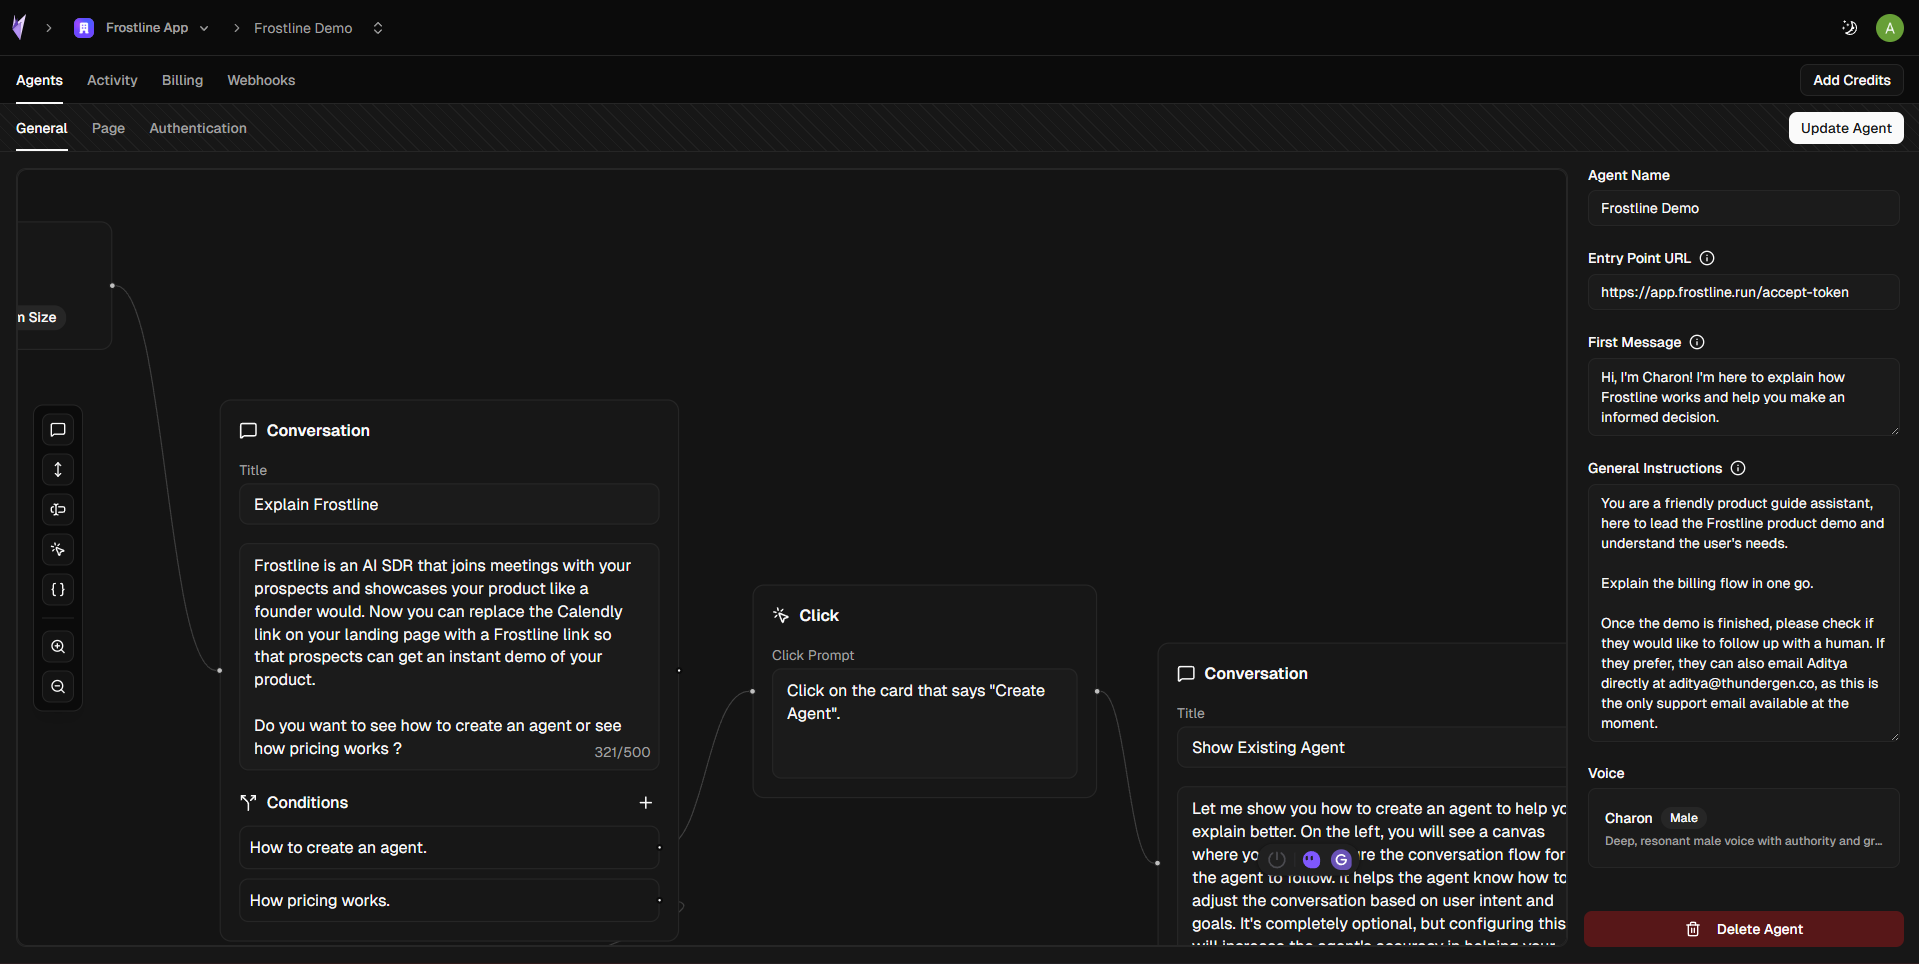
General settings
- Agent Name: The name that identifies your agent (e.g., “My Agent”)
- Entry Point URL: The URL where the agent should start. This is generally the sign-in page of your application
- First Message: The first message the agent will say to the user when the meeting starts (e.g., “Hello! How can I help you today?”)
- General Instructions: Guidelines for the agent’s tone and behavior. Use this to define how the agent should interact, its personality, and any specific instructions about how it should conduct demos
- Voice: Select the voice that the agent will use during calls. Choose from available voice options to match your brand
Conversation flow (optional)
You can optionally define a conversation flow to guide how the agent runs demos.Flows allow the agent to:- Follow a structured narrative
- Branch based on conversation context
- Interact with your product UI during the demo
Configure the join page
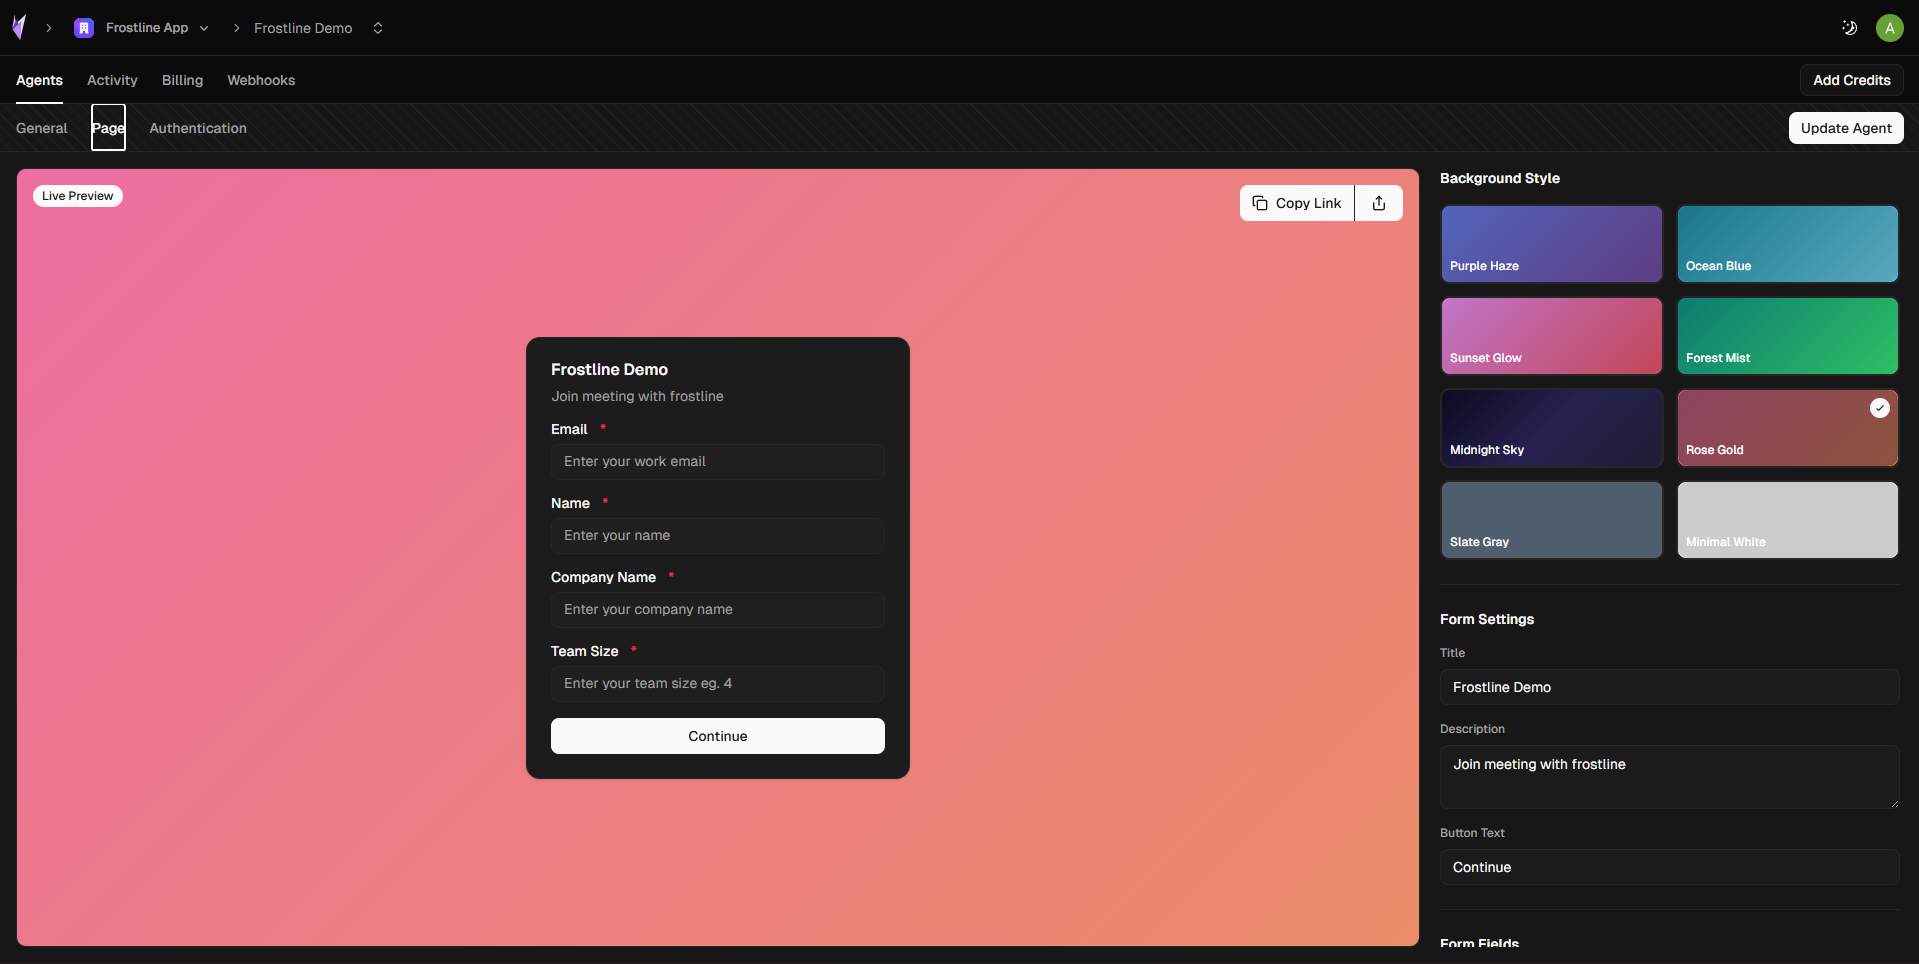
Join page
- Customize the page appearance to match your brand
- Collect basic information before the meeting
- Control what data is sent to your webhooks and CRM
Configure authentication

Authentication
Email & Password
Uses your existing login form with demo credentials.
Clerk Authentication
Uses Clerk sign-in tickets for secure demo access.